Users and roles
Who may sign in to your organisation and what each of them may do. Only an Admin can open this screen.
What you see
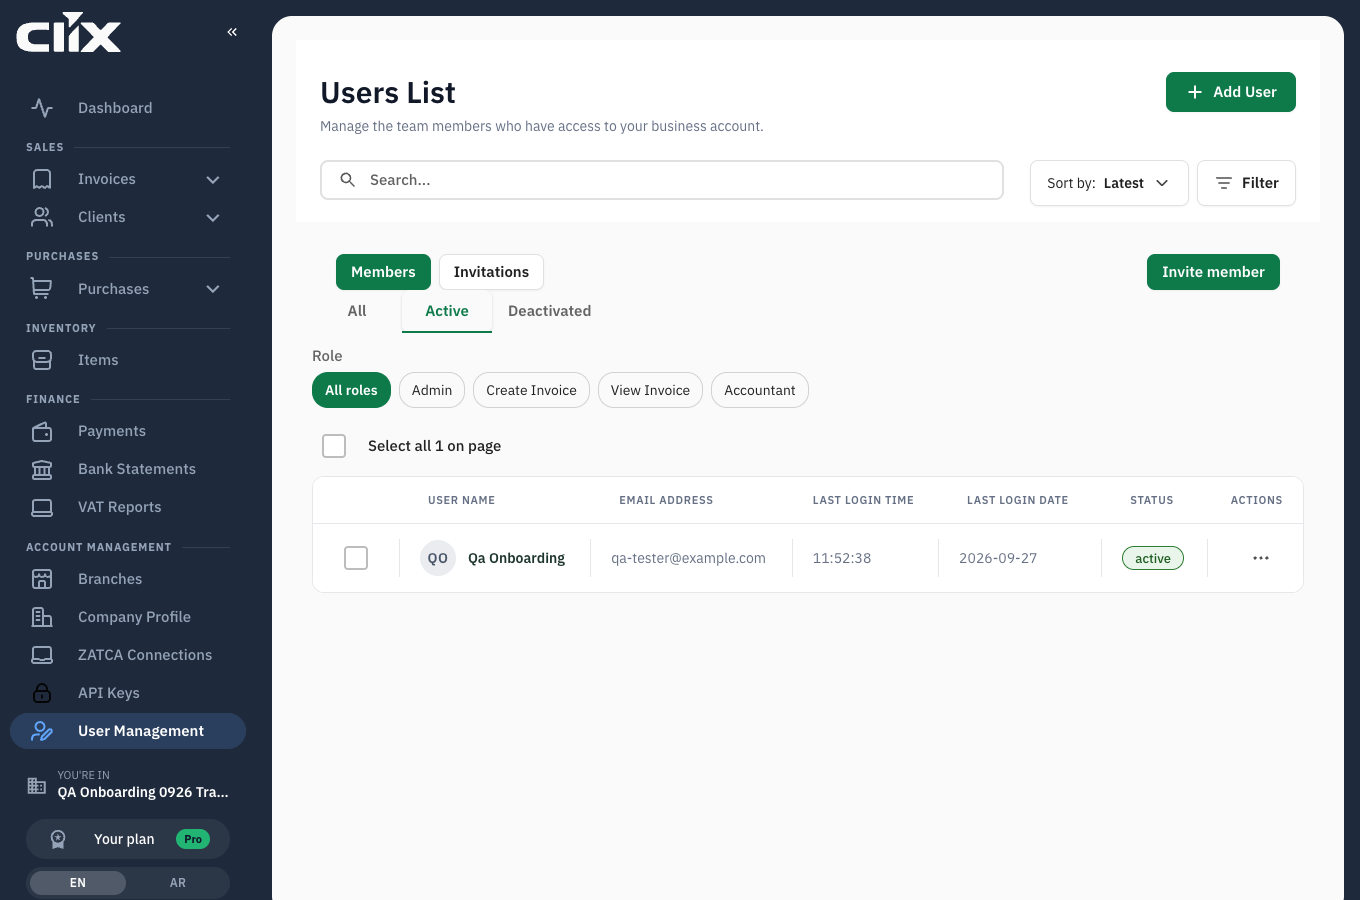
- Users List — "Manage the team members who have access to your business account."
- Members and Invitations: people who have joined, and invitations not yet accepted.
- All / Active / Deactivated: filter by status.
- The table: User name, Email address, Last login time, Last login date, Status, Actions.
- Add User and Invite member.
The four roles
| Role | In one line |
|---|---|
| Admin | Runs the organisation — plan, users, devices, profile |
| Accountant | Money and documents end to end; no administration |
| Create invoice | Issues invoices, manages clients and items |
| View invoice | Reads everything, changes nothing |
Full detail in Roles and permissions.
Tasks
Add a user directly
Why. You are creating the account for them.
Who. Admin.
- Click Add User.
- Enter First name, Last name, Phone and Email.
- Choose the role.
- Optionally upload a photo.
- Click Add User.
Result. The person appears under Members and can sign in.
Invite someone by email
Why. They create their own password, and you never handle it.
Who. Admin.
- Open the Invitations tab.
- Click Invite member.
- Enter the email address and choose the role.
- Send.
Result. The invitation is listed until accepted. The person receives an email with a link to join your organisation.
Change someone's role
Who. Admin.
Use Actions on their row. The change takes effect the next time they load a page.
Two limits
You cannot change your own role, and an organisation must always keep at least one Admin.
Deactivate someone
Why. They have left, or should not sign in for now.
Who. Admin.
Use Actions on their row, then filter by Deactivated to see them.
Result. They can no longer sign in. Nothing they created is removed — invoices, clients and items stay exactly as they are, and still show who created them.