Dashboard
The first screen after signing in. While your organisation is new it is a setup checklist; once you are running, it is where you start an invoice or a client without hunting through the menu.
What you see
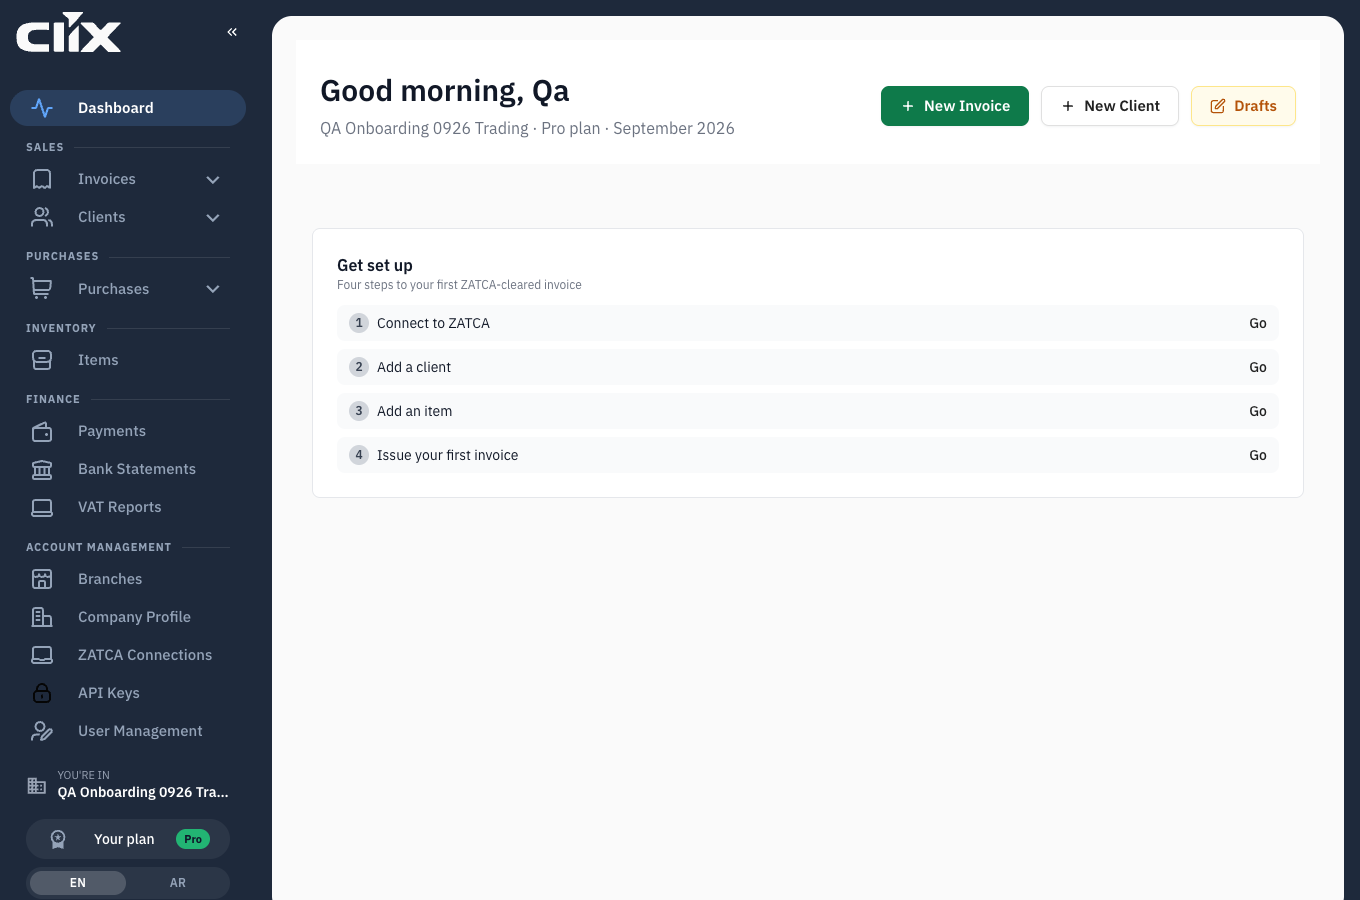
- Greeting and context: your name, then your organisation, plan and the current month — so you always know which organisation you are working in.
- Quick actions: New Invoice, New Client, and Drafts.
- Get set up: the four steps to your first ZATCA-cleared invoice, each with a Go button. It disappears once the steps are done.
- The sidebar: every module, grouped — Sales, Purchases, Inventory, Finance, Account management — with your organisation and plan chip at the bottom.
The setup checklist
New organisations see four steps in the order they have to happen:
- Connect to ZATCA — register a device and get its certificate. Nothing can be issued before this. See Connect a device to ZATCA.
- Add a client — who you are invoicing. See Clients and client groups.
- Add an item — what you are selling. See Items.
- Issue your first invoice — See Issue your first invoice.
Each Go button takes you to the right screen. You can do them out of order, but an invoice needs all three of the others first.
Tasks
Start an invoice from the dashboard
Who. Admin, Accountant, Create invoice.
Click New Invoice. This is the same form as Invoices → Create invoice; see Invoices for the steps.
Find a draft you left
Who. Admin, Accountant, Create invoice.
Click Drafts. Drafts do not count against your monthly invoice allowance until you submit them.
Check which organisation you are in
Who. Everyone.
The line under the greeting names the organisation, the plan and the month. If you belong to more than one organisation, confirm this line before you create anything — see Organisation profile and multiple organisations.