6. Invite your team
At the end of this step your colleagues sign in with their own accounts and see only what their role allows. Only an Admin can do this step.
Pick the role first
| Role | Can | Cannot |
|---|---|---|
| Admin | everything, including users, devices, branches, API keys and the subscription | |
| Accountant | invoices, purchases, payments, clients, items, bank statements, VAT reports, reconciliation | manage users, devices, the subscription |
| Create invoice | invoices, purchases, payments, clients, items | bank statements, VAT reports, anything an Admin owns |
| View invoice | read every screen | change anything |
Give the fewest rights that do the job. A bookkeeper who reconciles the bank is an Accountant; a salesperson who issues invoices is Create invoice; an auditor is View invoice. Full matrix in Roles and permissions.
Invite a colleague
- Open User Management and click Add User.
- Enter First Name, Last Name, Phone and Email.
- Choose the role in Select user role. A photo is optional.
- Click Add User.
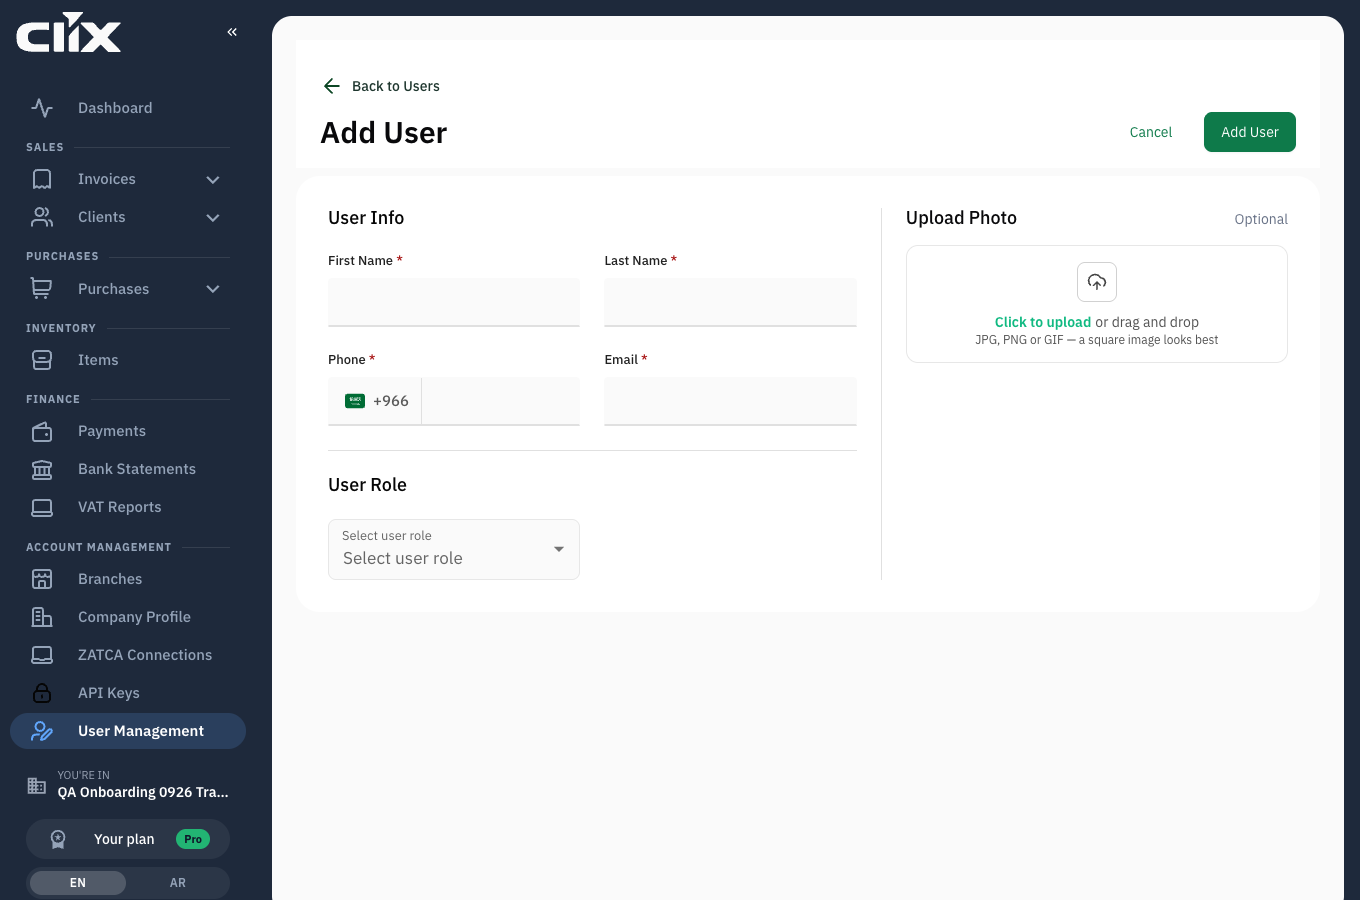
Result. They receive an email to set their password. They appear in Users List under the Active tab; the Deactivated tab holds anyone you switch off later. The role buttons above the list filter it: Admin, Create Invoice, View Invoice, Accountant.
Someone who already uses Clix
A person can belong to several organisations, for example an external accountant who serves many clients. For them use Invite member on the same page instead of Add User: enter their email and role, and the invitation appears under Invitations until they accept. On accepting, they see your organisation in Switch organization in the sidebar next to their others.
What just happened
Each colleague now has their own login and their own audit trail: every invoice, payment and change records who did it. Change a role or deactivate a user under Users at any time; deactivating keeps their history.
Next: Choose a plan